Nowadays a lot of us are most familiar with plants as decorative items, the millennial renters’ version of pets, but as you’ve seen through this blog series they have a much broader range of uses. This time we thought we’d introduce you to some creative activities you can try yourself!
Anthotypes
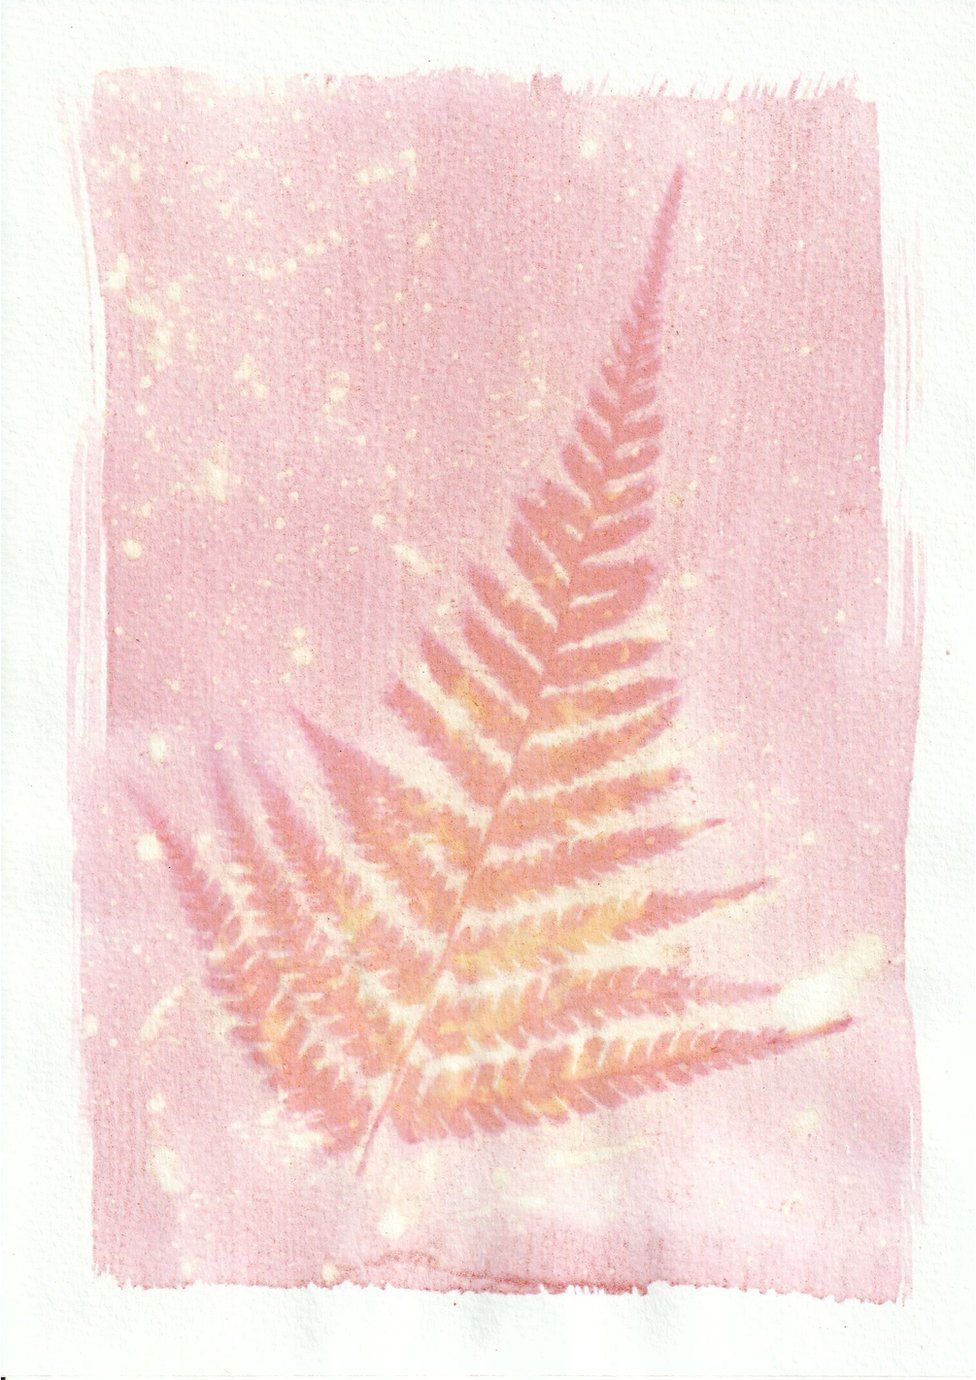
The ultimate coupling of art and science, anthotypes are the precursor to modern photography. They use the natural fading of plant pigments in the sunlight to create negative stain images of whatever you like.
List of equipment:
- Plant/spice to extract from (some suggestions are turmeric, blackberries, beetroot, spinach, red wine, lilacs, blueberries…have fun trying out different plants from your local area, just check you’re allowed to pick them first!)
- Pestle and mortar
- Jug
- Strainer (either a cheesecloth or a sieve)
- Dilutant (a clear alcohol or water is recommended. A clear vinegar would also work…or try different ratios of all three)
- Paint brush
- Paper (watercolour paper is ideal)
- “positive” items (leaves or flowers)
- Masking tape/very gentle double sided tape or a glass picture frame
- Sunshine!
- Firstly, make your emulsion. Grind up your plant you’re extracting colour from using the pestle and mortar. The more ground up and pulpy, the stronger the colour! You can also mix different plants together to get different colours, (if you’re using a pre-ground spice such as turmeric, add your dilutant here before you strain it).
- Strain the pulp over the jug to catch all the liquid.
- Add a few drops of your dilutant of choice to the jug. Experiment with different dilutants/ratios for different effects.
- In a light pencil, keep a record of your emulsion on the back of the paper you intend to use.
- Using the paint brush, coat all your paper using the emulsion you just made.
- Allow the paper to dry completely in a dark room (an airing or kitchen cupboard is ideal)
- Arrange your positives on the paper
- Temporarily seal them to the paper either by placing the paper in a glass picture frame or using very small bits of tape
- Leave in a bright location (eg windowsill facing the sun) for 1-3 weeks (experiment with time for different effects!). The UK can be really variable on this but try and see it as an advantage- varied weather means you can get really varied images.
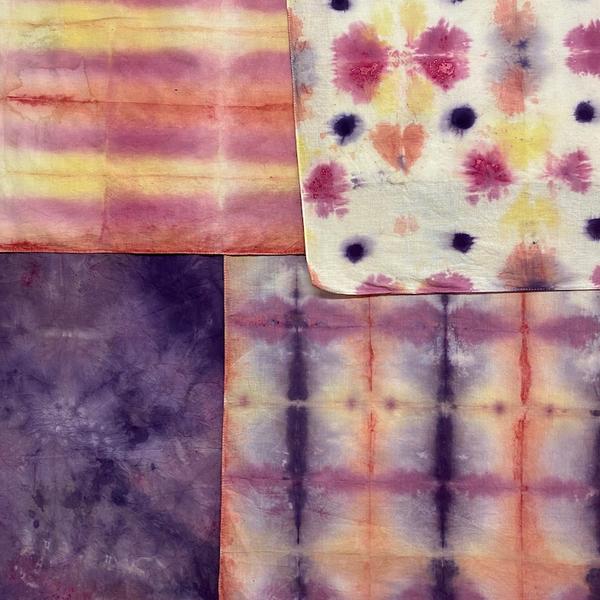
Natural Tie-dye
Tying in with the anthotypes activity, you can use the same dyes to make your own natural tie-dye items. You’ll have to wash these very gently as washing powders/liquids are designed to remove plant stains!
You will need:
- Fabric, white or pale coloured (experiment with different materials for different effects!)
- String or rubber bands
- A bucket, basin or large saucepan
- Water
- Rubber gloves
- A fine mesh sieve or cheesecloth
- Plants to make your dyes from (blueberries, beetroot, spinach, coffee grounds, dandelions are all good places to start but try out other plants or mixtures of plants for different colours)
- Prep your fabric. Twist it and tie it using string or rubber bands into whatever pattern you desire. Rinse under cold water and wring out excess water.
- Prep your dye. Chop or blend up whatever plant you are using with 2 parts water to 1 part plant (If you are using a spice or coffee grounds it’ll be 3-4 tbsp per 6-8 cups of water). Simmer the resulting solution for ½ an hour and then strain off the solids. Experiment with different times to see how it affects your dye!
- Time to tie dye! Now there’s a number of options here. You can put all of your fabric straight into the dye and leave it for a while or you can dip dye parts of the fabric in several different coloured dyes. Or you can put your dyes into squirty bottles and have a bit more control over which parts are dyed which colour. Always remember to wear your gloves whilst doing this! Rinse afterwards with clean water.
- Aftercare. Vegetable based dyes are less resistant to the chemicals found in many cleaning products than synthetic dyes. You will need to wash your items by hand using a gentle soap and they will fade over time. However they can be refreshed by dying them again!